
I loved paper dolls when I was a little girl. The only problem with paper dolls is that you have to be really careful with them so that they don't rip. Wouldn't a "no-rip" paper doll be great? Enter the Felt "Paper Doll"--the perfect paper doll for little girls with little hands.

Shhh! This doll is for my 2 year old niece, Taegen. She is traveling to my house in Virginia from Kansas with her parents as I type (so I have no worries about her--or my sister--seeing this post before she gets here).
Want to make your own? here is how I did it:

Draw a doll figure. I like to make the head a little bigger because that is how little kids look--big noggins, ya know?
This was probably the "hardest" part (and not really hard at all, even if you think you can't draw).
Here is a tip: free hand draw and then fold the drawing in half length-wise and cut out. That way, your doll will be symmetrical.

Next, trace the doll in black marker on another piece of paper.

Now to draw the clothes.
Lay another piece of paper on top of the marker drawing.

Use the doll template to draw clothes right on top!
A shirt....

A dress? Pants? Skirt? Ballerina tu-tu? Whatever you want!
By drawing on top of your marker drawing, you can make sure that the clothes will fit the finished doll.
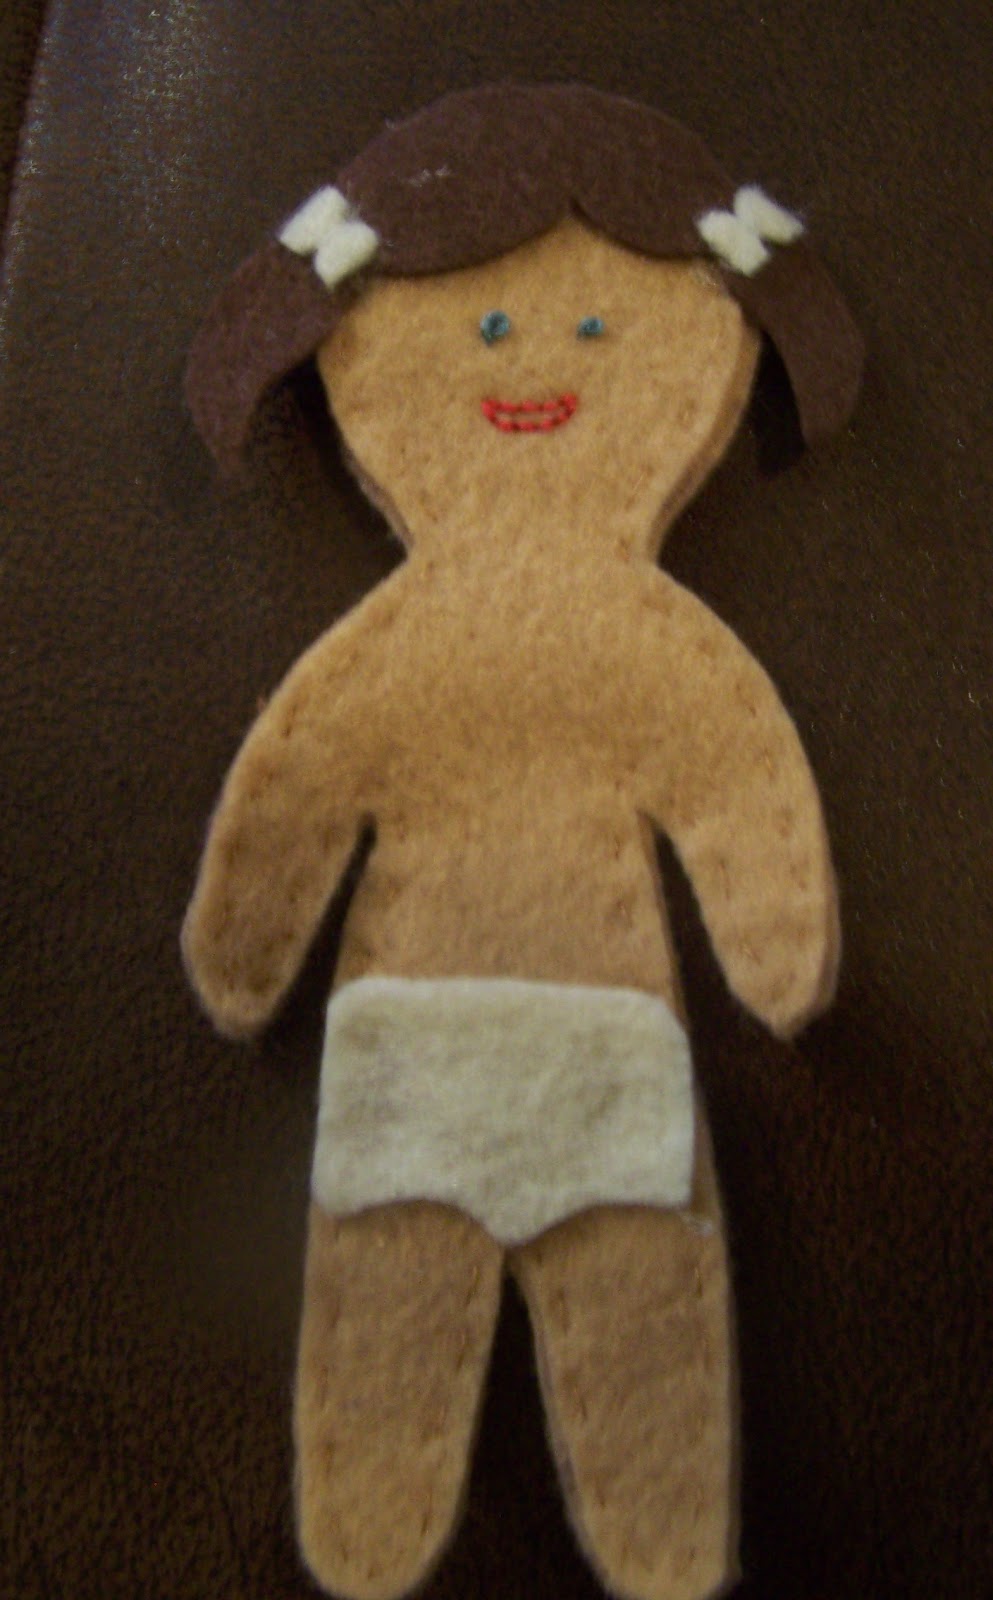
I actually cut two doll shapes and hand sewed them together to give the doll a little more stability. Hot-gluing two doll shapes together would work well too.
I also hot glued the hair (which I drew using the marker template as well) and underwear on (don't judge me for the huge man-panties on this doll...I'm not perfect...)
I also hot glued the hair (which I drew using the marker template as well) and underwear on (don't judge me for the huge man-panties on this doll...I'm not perfect...)
I made the face with embroidery thread but hot gluing felt eyes and mouth or even drawing a face would work too.
Next, use your clothes patterns to cut out clothes from felt.

Skirt and shirt!

Shirt and pants!

Little red dress? Yes, please!
Ballerina tu-tu? Adorable!

Go wild! Cut and coordinate lots of outfits. Felt sticks to felt so making the cloths out of felt will ensure that your little girl will have hours of fun putting clothes on her new little friend. :)
I hope my niece loves her new "paper doll" and I hope your little girl will love her's too! Make one today!

